Authenticate Node.js Applications using Passport
What is Passport.js?
As we all know, User authentication is fundamental to almost every web application in existence.Now given the ubiquity of the need to impelement this user authentication as a feature of our web apps, it wouldn’t make sense to implement it from scratch each time.This is where passport comes in.
Passport is a authentication middleware for Node.js applications. It’s extremely flexible and modular, that can be fully customised and works great with express web applications. It is flexible in the sense that it allows for different authentication strategies like Local Strategy(username and password), Facebook, Twitter and more.
All of the code from this article is available for download on GitHub.
Prerequisites
Node.js - Download and install Node.js
MongoDB - Download and install MongoDB Community Server.Follow the instructions for your OS. Note, if you’re using Ubuntu, this guide can help you get Mongo up and running.
Creating the Project
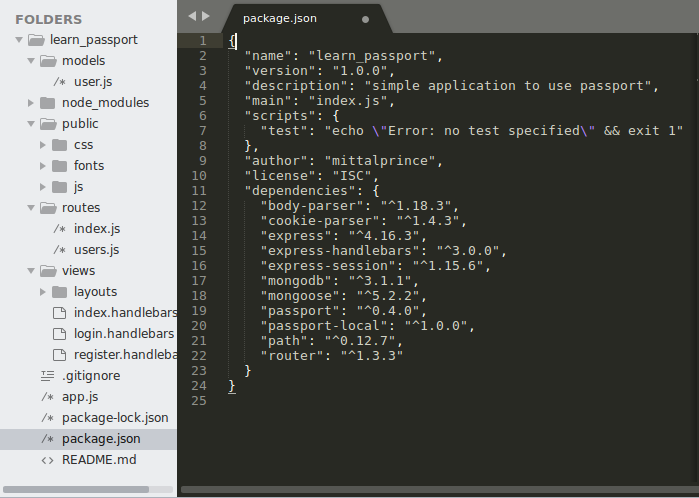
Our Project structure and dependencies (package.json) will be like this :
Once all the prerequisites software is set up, we can start our project. First create the folder for app and open the terminal and write the following command for node app.
npm init Now enter the details for Node’s package.json or hit enter until the end.
Setting Up Express
Install express, write the following command in the terminal:
npm install express --saveNow we will need to install other packages which we will use in our project:
npm install body-parser cookie-parser express-handlebars express-session router path --saveWhen you have installed all required packages, then create a file server.js/app,js in the root folder of your app and require all the packages.
Write the following content in the file:
/* Setting Up Express */

var express = require('express');
var path = require('path');
var cookieParser = require('cookie-parser');
var bodyParser = require('body-parser');
var exphbs = require('express-handlebars');
var session = require('express-session');

var app = express();

app.use(bodyParser.json());
app.use(bodyParser.urlencoded({extended:false}));
app.use(cookieParser());
Now make a folder views in the root directory of project inside it create another folder layout, create layout.handlebars inside layout and add the folowing content:
<!DOCTYPE html>
<html>
<head>
<title>Login_App</title>
<link rel="stylesheet" href="/css/bootstrap.css" />
<link rel="stylesheet" href="/css/style.css" />
</head>
<body>
<div class="container">
<div class="header clearfix">
<nav>
<ul class="nav nav-pills pull-right">
<li role="presentation"><a href="/users/login">Login</a></li>
<li role="presentation"><a href="/users/register">Register</a></li>
</ul>
</nav>
<h3 class="text-muted">Login_App</h3>
</div>
<div class="row">
<div class="col-lg-12">
{{{body}}}
</div>
</div>
<footer class="footer">
<p>© 2018 Login_App, Inc.</p>
</footer>
</div> <!-- /container -->
</body>
</html>In above code we use process.env.PORT to set the port to the environment port variable if it exists. Otherwise, we’ll default to 8000, which is the port we’ll be using locally. This gives you enough flexibility to switch from development, directly to a production environment where the port might be set by a service provider like, for instance, Heroku.
Now we will set the view engine and set default html page. So add the content in app.js file
app.set('views', path.join(__dirname , 'views'));
app.engine('handlebars', exphbs({defaultLayout:'layout'}));
app.set('view engine', 'handlebars');

app.use(express.static(path.join(__dirname,'public')));

app.set('port', (process.env.PORT || 7000));
app.listen(app.get('port'), function(){
	    console.log('Server listening on port ' +app.get('port'));
});
Make index.handlebars file in views folder and add css for the html pages. So create a folder public/css in root directory of project and add custom css (you may copy the css from github or you may write your own).
<!-- For index.handlebars -->

<h2 class="page-header">Dashboard</h2>
<p>Welcome to your dashboard</p>
To render the index.handlebars page we first make a folder in routes in root of project and inside it create index.js. In index.js write the follwoing content:
var express = require('express');
var router = express.Router();

router.get('/', function(req, res){
   res.render('index');
});

module.exports = router;
In app.js you will require the index.js file and render the home page for your localhost, so add the content:
var routes = require('./routes/index');

app.use('/', routes);
Now open your terminal and start your server by writing the following command:
node app.js when you hit enter, you will get “Server is listening on 8000 port”, open your browser and go to “localhost:8000” and you will see a default layout.handlebars page with content “Welcome to dashboard”.
Next we will need a form to register a user and also a login page with username and password field as well as a submit button.Let’s do that create login.handlebars and register.handlebars file in the views folder with following contents:
<!-- register.handlebars -->

<h2 class="page-header">Register</h2>
<form method="" action="">
	<div class="form-group">

	    <label>Name</label>
	    <input type="text" class="form-control" placeholder="Name" name="name">

	</div>
	<div class="form-group">

	    <label>Username</label>
	    <input type="text" class="form-control" placeholder="Username" name="username">

	</div>
	<div class="form-group">

	    <label>Email</label>
	    <input type="email" class="form-control" placeholder="Email" name="email">

	</div>
	<div class="form-group">

	     <label>Password</label>
	     <input type="password" class="form-control" placeholder="Password" name="password">

	</div>
	<div class="form-group">

	     <label>Confirm Password</label>
	     <input type="password" class="form-control" placeholder="Password" name="password2">

	 </div>

	 <button type="submit" class="btn btn-default">Submit</button>

</form>
<!-- login.handlebars -->
<h2 class="page-header">Account Login</h2>
<form method="" action="">
<div class="form-group">
<label>Username</label>
<input type="text" class="form-control" name="username" placeholder="Username">
</div>
<div class="form-group">
<label>Password</label>
<input type="password" class="form-control" name="password" placeholder="Password">
</div>
<button type="submit" class="btn btn-default">Submit</button>
</form>Next we will make routes to render the Login and Register page. So create file users.js in routes folder and add following content:
var express = require('express');
var router = express.Router();

router.get('/register', function(req, res){
   res.render('register');
});

router.get('/login', function(req, res){
    res.render('login');
});

module.exports = router;
After adding the content require the users file in app.js file:
var users = require('./routes/users');

app.use('/users', users);
So after adding this content when you again start the server and click on login/register link you will see Login form/Register form.Till now we have successfully setup the express and create all html pages.
Setting Up Passport
First we install passport using the following command”
npm install passport --saveIn app.js require the passport and add following lines at the bottom to initialize the passport along with its session authentication middleware:
var passport = require('passport');

app.use(passport.initialize());
app.use(passport.session());
Creating A MongoDB Data Store
Here we are using mLab to store data, so we are assuming that you have already an account on mLab. Create a new Mongodb Deployment of plan type SANDBOX (it is free upto 500 MB). After creating the database add the db User.
Now we have a database, we need a way to communicate with it from our application. We will be using Mongoose to achieve this. Let’s go ahead and install it with following command”
npm install mongoose --saveNow we have to configure Mongoose. You know the process, add following lines in you app.js file:
var mongoose = require('mongoose');

mongoose.connect('mongodb://<dbuser>:<dbpassword>@ds227469.mlab.com:27469/<databasename>',function(){
    console.log('connected to mongodb');
});
You must write your own dbusername at place of <dbuser> and passowrd & databasename respectively.
Next make a folder models in root directory of project and inside it create user.js file. In this file we will define the schema of database.So add the content in user.js file:
var mongoose = require('mongoose');

// User Schema
var UserSchema = mongoose.Schema({
    username: {
        type: String,
        index:true
    },
    password: {
        type: String
    },
    email: {
        type: String
    },
    name: {
        type: String
    }
});

var User = module.exports = mongoose.model('User', UserSchema);
That’s all for the Mongoose Setup.We can now move on to implement our Strategy.
Implementing Local Authentication
Now we will congigure out authentication strategy using passport-local. So install it using command:
npm install passport-local --saveFinally we have come to the last portion of code! Now add the following code in the users.js file:
var passport = require('passport');
var LocalStrategy = require('passport-local').Strategy;

var User = require('../models/user');

router.post('/register', function(req, res){
    var name = req.body.name;
    var email = req.body.email;
    var username = req.body.username;
    var password = req.body.password;
    var password2 = req.body.password2;
    {
        User.findOne({email:email, username:username}).then(function(currentUser){
	        if(currentUser){
	            console.log('user is already registered:',currentUser);
                res.redirect('/users/register')
            }else {
	                var newUser = new User({
	               	    name: name,
	                    email:email,
	                    username: username,
	                    password: password
	                });
	                newUser.save(function(err,user){
	                    if(err) throw err;
	                    console.log(user);
	                })
	                res.redirect('/users/login');
	            }
	        })
	}
});

/* Passport Local Authentication */
passport.use(new LocalStrategy(
    function(username, password, done) {
        User.findOne({
            username: username
        }, function(err, user) {
            if (err) {
                return done(err);
            }
            if (!user) {
                return done(null, false);
            }
            if (user.password != password) {
                return done(null, false);
            }
            return done(null, user);
        });
    }
));
passport.serializeUser(function(user, done) {
    done(null, user.id);
});
passport.deserializeUser(function(id, done) {
    User.findById(id, function(err, user) {
        done(err, user);
    });
});
router.post('/login',
    passport.authenticate('local', {successRedirect:'/', failureRedirect:'/users/login'}),
    function(req, res) {
        res.redirect('/users/login');
    });

router.get('/logout', function(req, res){
    req.logout();

    res.redirect('/users/login');
});
Let’s understand what we have done in users.js file. First we require the passport-local Strategy and database model then we handle the post request for users/register path, in this function we first check whether user is registered with same username or not. If not then we save the user in the database and redirect the login page otherewise redirect register.handlebars.
Then we tell the passport to use an instance of the Local-Strategy which we required. Then we use the command to find the user in the database with same credentials(username and password). If in record username finds and password matches, then above code returns the user otherwise false.
Then we are using serializeUser and deserializeUser callbacks.The first one will be invoked on authentication, and its job is to serialize the user instance with the information we pass to it (the user ID in this case) and store it in the session via a cookie. The second one will be invoked every subsequent request to deserialize the instance, providing it the unique cookie identifier as a “credential”. You can read more about that in the Passprot documentation.
Then we implement the strategy using passport.authenticate which attempts to authenticate with the given strategy on its first parameter, in this case 'local'.If it will fails then redirect us to login page otherwise we will redirect to our Dashboard. Then we have set the function to handle the logout request. It’s very simple, in passport we have req.logout() function which terminates a login session. Invoking logout() will remove the req.user property and clear the login session.
Now we have to update some files so that we can make our app better. So in app.js write the code above app.use(passport.initialize()) this line:
app.use(session({
    secret: 'secret',
    saveUninitialized:true,
    resave: true
}));

And add content below app.use(passport.initialize()) :

app.use(function(req,res,next){
    res.locals.user = req.user || null;
    next();
})
Now in layout.handlebars update the html by writting the below the code:
<ul class="nav nav-pills pull-right">

    {{#if user}}

        <li role="presentation"><a href="/">Dashboard</a></li>
        <li role="presentation"><a href="/users/logout">Logout</a></li>

    {{else}}

		<li role="presentation"><a href="/users/login">Login</a></li>
        <li role="presentation"><a href="/users/register">Register</a></li>

    {{/if}}
</ul>
In above code we check if user is login or not.If not then he has an option of login and register otherwise we will show the option of Dashboard and logout.
Now last thing which we will do is in app.js file update the code:
router.get('/', ensureAuthenticated, function(req, res){
    res.render('index');
});

function ensureAuthenticated(req, res, next){
    if(req.isAuthenticated()){
        return next();
    } else {
        //req.flash('error_msg','You are not logged in');
        res.redirect('/users/login');
    }
}
Rest code will remain same.This code check whether user is login or not .If not then he can’t access dashboard page untill he is login.
That’s all we need for the app to work. We’re done!
Now restart the server and go to http://localhost:8000 and register yourself then login. If it all goes well, you should see the message “Welcome to dashboard ” in the browser.
Conclusion
In this article we have learned how to implement local authentication using Passport in Node.js application. In this process, we also learned how to connect to MongoDB using Mongoose.
We have only added the necessary modules for this app to work - nothing more, nothing less. For a production app you must need to add other middleware and also we have saved unhashed passwords. So you may use bcryptjs for salting and hashing password, as in this article we have just focused on doing local authentication.